Setting up and using the Mutt email client in Linux
Social Share:
Wednesday, August 14, 2024 at 2:25 PM | 4 min read
Last modified on Wednesday, August 5, 2026 at 7:49 PM
#command line, #linux, #linux mint, #mutt email client, #email attachment, #security, #series
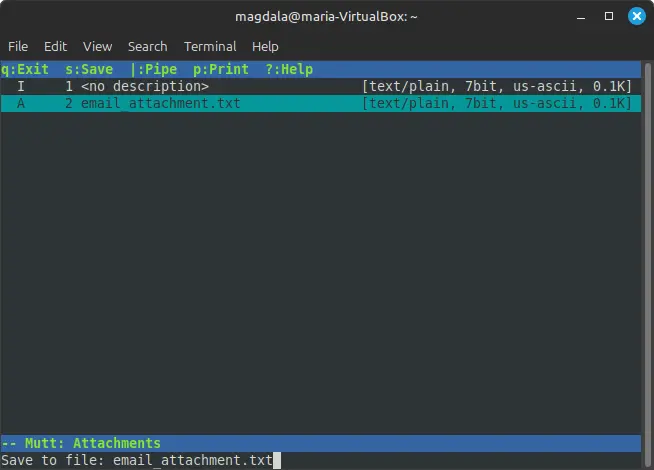
Screenshot of user saving email attachment with Mutt
Table of Contents
- What is Mutt?
- Installing Mutt
- Sending an email locally to another user which contains an attachment
- Other user receives email and saves email attachment locally
- Conclusion
- Related Resources
- Related Posts
I selected Mutt as my email client of choice because I love the fact that I could send and receive emails via command line and still be able to include real email attachments and save attachments I receive to my Linux Mint VirtualBox.
What is Mutt?
Mutt is a powerful command line email client that sends and receives emails via Terminal. I use it in addition to mailx, because unlike mailx, it is able to send real email attachments as well as save those attachments on a user's local machine.
Mutt supports MIME, GPG, PGP, and threading, making it a powerful tool for managing emails directly from the Linux command line. Mutt also allows system administrators to automate and streamline their workflows with automated notifications. Email plays a critical role in system security and can be used to deliver security alerts, confirm user actions, and even recover lost passwords. By properly managing emails using Mutt, I can enhance the security of my Linux system.
There are many other uses for Mutt. To learn more, please visit the article entitled Mastering Mutt: How to Install Mutt Command in Linux.
Installing Mutt
One thing to note: In whichever directory I initialize mutt from becomes the default directory where email attachments are saved.
Mutt is not native to Linux. I have to install it. I am on the Ubuntu derivative Linux Mint, so I can install it with the following commands:
sudo apt update
sudo apt upgrade
sudo apt install mutt
Since I only want to use it locally because I have Linux Mint installed with VirtualBox and only have so much virtual and hard disk space to work with, I decided to pass up on using an external (Gmail) email address to send and receive emails. My main reason for wanting to use Mutt was because of its ability to send email attachments and save received attachments locally. There are many other powerful features available, but this is the feature that grabbed my attention.
Sending an email locally to another user which contains an attachment
If I wanted to send a file to another user on the local network in Linux using Mutt, I would take the following steps:
First, I would cd into the directory where I first initialized mutt. For me, it was my home directory, /home/maria.
Next, I would determine which email attachment I wanted to send to the other user.
Next, I would send a text file called email_attachment.txt to local user magdala, which contained the text This is some dummy text for the mutt email attachment demo I am creating for my post entitled "Setting up and using the Mutt email client in Linux." I would run the following command in Terminal:
mutt -s "Sending Magdala the email_attachment.txt" -a email_attachment.txt -- magdala@maria-VirtualBox
This opens up the mutt interface in the nano text editor. It looks something like the following:
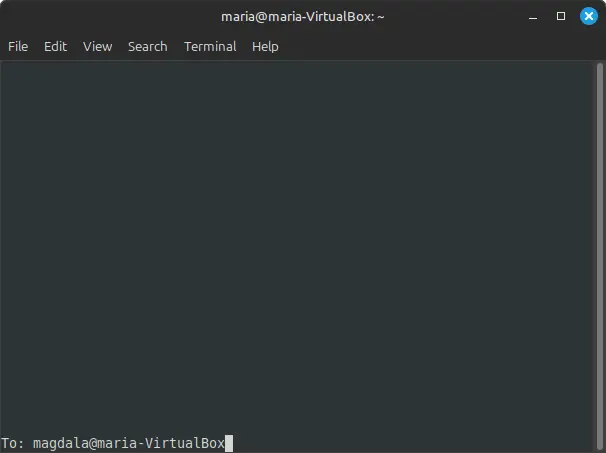
Screenshot of the "To" email line
Then I press the "Return" key, and something like the following appears:
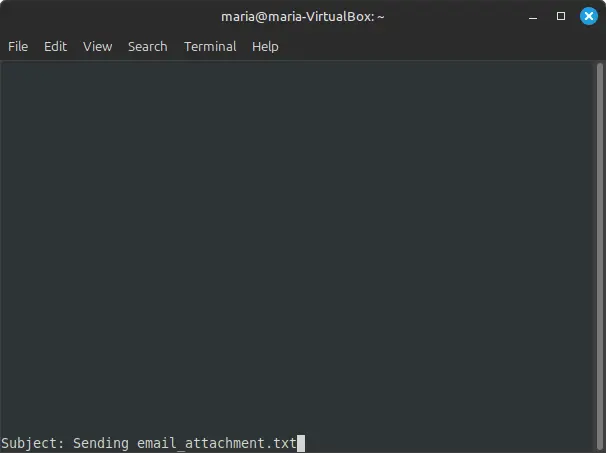
Screenshot of the email subject line
Next, I press "Return" and the following appears:
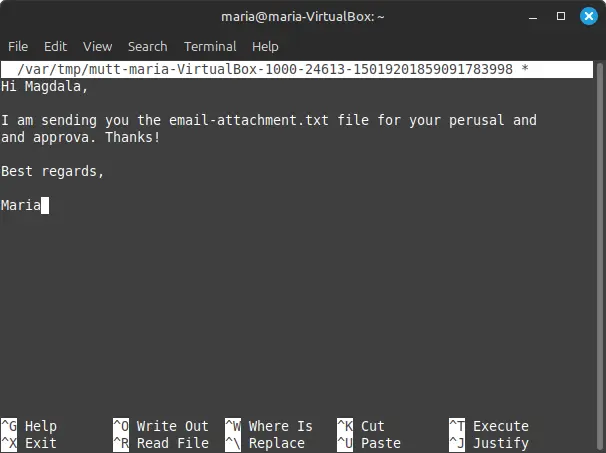
Screenshot of the body of the email
The next part is very important to follow correctly. After I have completed the body of my email, I press "Control" + "O" (not zero) key and then the "Return" key, and then the following appears:
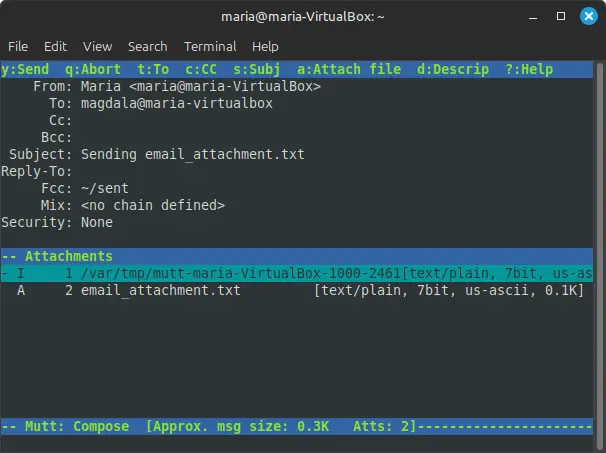
Screenshot of sending an email to user magdala
As shown at the top of the window, I press the "y" key to actually send the email to user magdala. Then, at the bottom of the window, "Mail sent" appears, and then I am taken back to the Terminal command prompt.
Other user receives email and saves email attachment locally
Next, user magdala opens her emails using the mutt command, and something like the following appears:
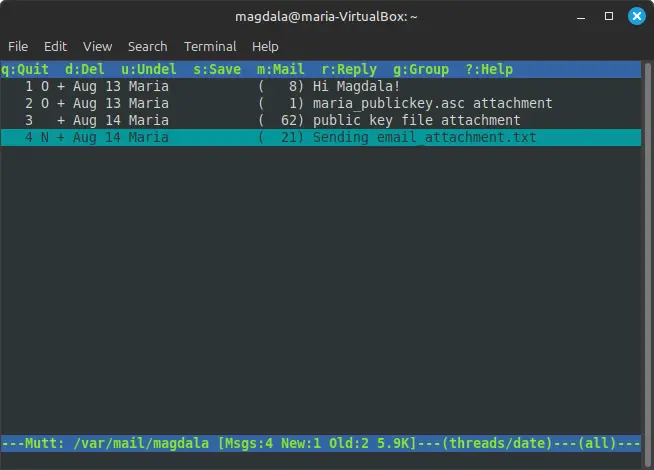
Screenshot of user magdala's email inbox
Next, user magdala makes sure to select the email which contains the attachment she wants to save to her local machine using the "Up" or "Down" arrow key, and then she presses the "V" key. This results in something like the following:
Screenshot of user magdala saving attachment
Next, user magdala presses the "S" key, and that is when the text "Save to file: email_attachment.txt" appears. And then the following appears after that:
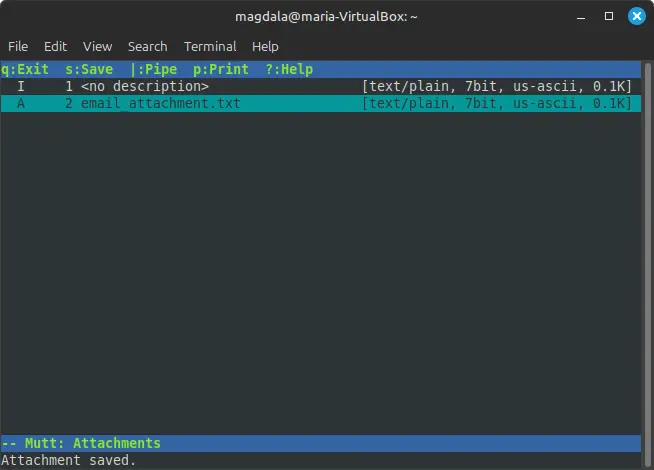
Screenshot of attachment saved
Next, user magdala presses the "Q" key, and is taken back to the Terminal command prompt:
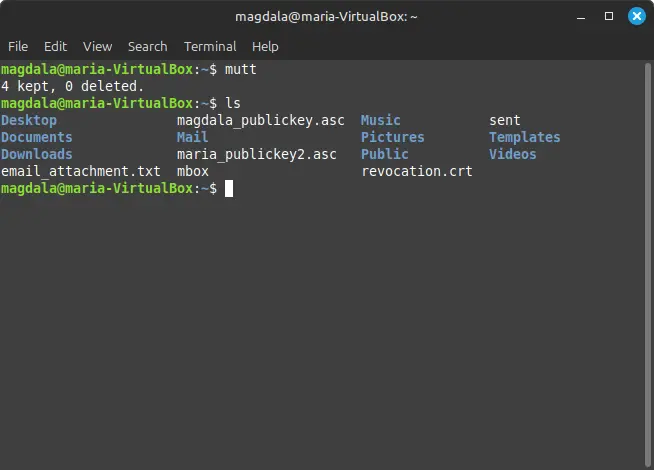
Screenshot of user magdala being taken back to Terminal command prompt
And as also shown in the screenshot, she then runs the ls command to make sure that the email_attachment.txt file has been saved to her home directory. And it was!
Conclusion
In this post, I cover the basics of sending, receiving, and saving email attachments using Mutt.
Related Resources
- How to Install Mutt on Linux Mint Latest: kb.shells.com
- Mutt – A Command Line Email Client to Send Mails from Terminal: tecmint.com
Related Posts
- Sending and receiving local email in Linux Mint/VirtualBox series table of contents: mariadcampbell.com
- Asymmetric encryption and decryption series table of contents: mariadcampbell.com