A Slidev deck that runs Python: one place for my meetup’s challenges
Social Share:
Thursday, October 8, 2026 at 8:40 PM | 20 min read
Last modified on Thursday, October 8, 2026 at 8:40 PM
#binary code, #command line, #gh, #github actions, #github pages, #macOS, #markdown, #mcp server, #pyodide, #python3, #qr codes, #slidev, #unocss, #vue

Photo by David Clode on unsplash.com
Table of Contents
- Why Slidev?
- Installing Slidev
- Installing Neversink
- Setting up the Slidev slide deck workflow
- Creating the binary challenge slides
- Creating the Related resource slide
- Creating the Find me slide
- Creating the Pyodide code runner
- Creating GitHub Pages Actions
- Fixing the CSS minify crash in my first local build
- Adding the cover layout to the title slide
- The Slidev MCP server
- Conclusion
- Related Resources
- Footnotes
I am working on an image steganography project, and at one point, to get a better understanding of the binary code involved, I had Claude write some exercises emanating from the project code. It was so much fun to figure out that I decided to make them into challenges for attendees to solve at my next meetup. I wanted a slide deck that would also serve as a live coding platform where the members could both read what the challenges were and solve them live within the same deck. That way, they wouldn't have to go elsewhere on the web, for example, to write code that outputs results. They could do it right from the slide deck. That's where Slidev came in, and that's why this post. I will walk through how I made Slidev into a Python code runner, a feature which it does not support out of the box (it already runs JavaScript and TypeScript).
Why Slidev?
Slidev is known as "Presentation slides for developers." It is Markdown-based, which is great, and it provides all sorts of features that focus on presentation interactivity, visual eloquence, and appeal. All those reasons aside, I also like the fact that I could create a Python code runner so that my meetup attendees would have the option of running code directly within the slide deck. That way, they would be able to read and write their challenges all in one place!
Installing Slidev
To install Slidev, run:
npm init slidev@latest
The Slidev installation comes with the default theme.
Installing Neversink
To install Neversink after installing Slidev, execute the following in Terminal:
npm install slidev-theme-neversink
This is the theme that I am using in my slide deck.
Setting up the Slidev slide deck workflow
The Slidev version I built my meetup slide deck with is 53, and the theme I used is called Neversink.
I had the option of deploying to either Netlify or Vercel: Slidev comes with both a netlify.toml and vercel.json. But I opted for deploying to GitHub Pages using GitHub Actions and am hosting the slide deck on GitHub.
What I removed from the Slidev starter template and what I kept
| File | Decision |
|---|---|
| package.json, package-lock.json | Keep (npm) |
| slides.md | Keep |
| pnpm-workspace.yaml | Remove if you're using npm |
| netlify.toml / vercel.json | Keep the one for where you'll host, if you host it at all |
| components/Counter.vue | Template demo: remove or keep as a reference |
| snippets/external.ts | Template demo: remove or keep as a reference |
| pages/imported-slides.md | Template demo: remove or keep as a reference |
I went with npm instead of pnpm (which was an option). I don't like downloading anything globally, and I would have had to do so with pnpm. I prefer using npm anyway.
I deleted pnpm-workspace.yaml since I was going with npm, and I deleted netlify.toml and vercel.json since I was deploying to GitHub Pages instead.
I kept components/Counter.vue, snippets/external.ts, and pages/imported-slides.md as references. I thought it good to keep them as guides in case I wanted to implement any of those features.
Customizing the Slidev slide deck headmatter
I can customize my whole slide deck in my headmatter, which is the frontmatter located right before my first slide. Mine looks like the following:
---
theme: neversink
title: The Debug Table Binary Exercises
info: Binary challenges for The Debug Table's second gathering.
# apply UnoCSS classes to the current slide
class: text-left
# https://sli.dev/features/drawing
drawings:
  persist: false
# slide transition: https://sli.dev/guide/animations.html#slide-transitions
transition: slide-left
# enable Comark Syntax: https://comark.dev/syntax/markdown
comark: true
# duration of the presentation
duration: 150min
colorSchema: dark
layout: cover
monaco: true
author: Maria D. Campbell
---
However, I can also override the slide deck headmatter by customizing individual slides as well. For example, my second slide's frontmatter consists of:
---
layout: top-title-two-cols
columns: is-6-6
align: c-lm-lm
---
The Neversink layout options
The frontmatter at the start of each slide is meant to specify the type of slide and provide parameters to the layout as in the frontmatter above.
There, the top-title-two-cols layout refers to a banded slide title at the top of the slide, and two columns in the body. Using this layout means there are three slots. Slots define the content of the slides. For example, the above frontmatter needs a :: title ::, :: left ::, and :: right :: slot:
---
layout: top-title-two-cols
columns: is-6-6
align: c-lm-lm
---

:: title ::

# Meetup event schedule

:: left ::

<div class="flex items-center justify-between mt-48">
  <div class="text-center">
    <div>Arrive & intros</div>
    <div class="text-amber-400 text-sm">(~30 min)</div>
  </div>
  <carbon-arrow-right class="text-amber-400 text-3xl" />
  <div class="text-center">
    <div>Binary challenges</div>
    <div class="text-amber-400 text-sm">(~35 min)</div>
  </div>
</div>

:: right ::

<div class="flex items-center justify-between mt-48">
  <carbon-arrow-right class="text-amber-400 text-3xl" />
    <div class="text-center">
      <div>Your projects</div>
      <div class="text-amber-400 text-sm">(~75 min)</div>
    </div>
  <carbon-arrow-right class="text-amber-400 text-3xl" />
  <div class="text-center">
    <div>Wrap-up</div>
    <div class="text-amber-400 text-sm">(~10 min)</div>
  </div>
</div>
This renders as:
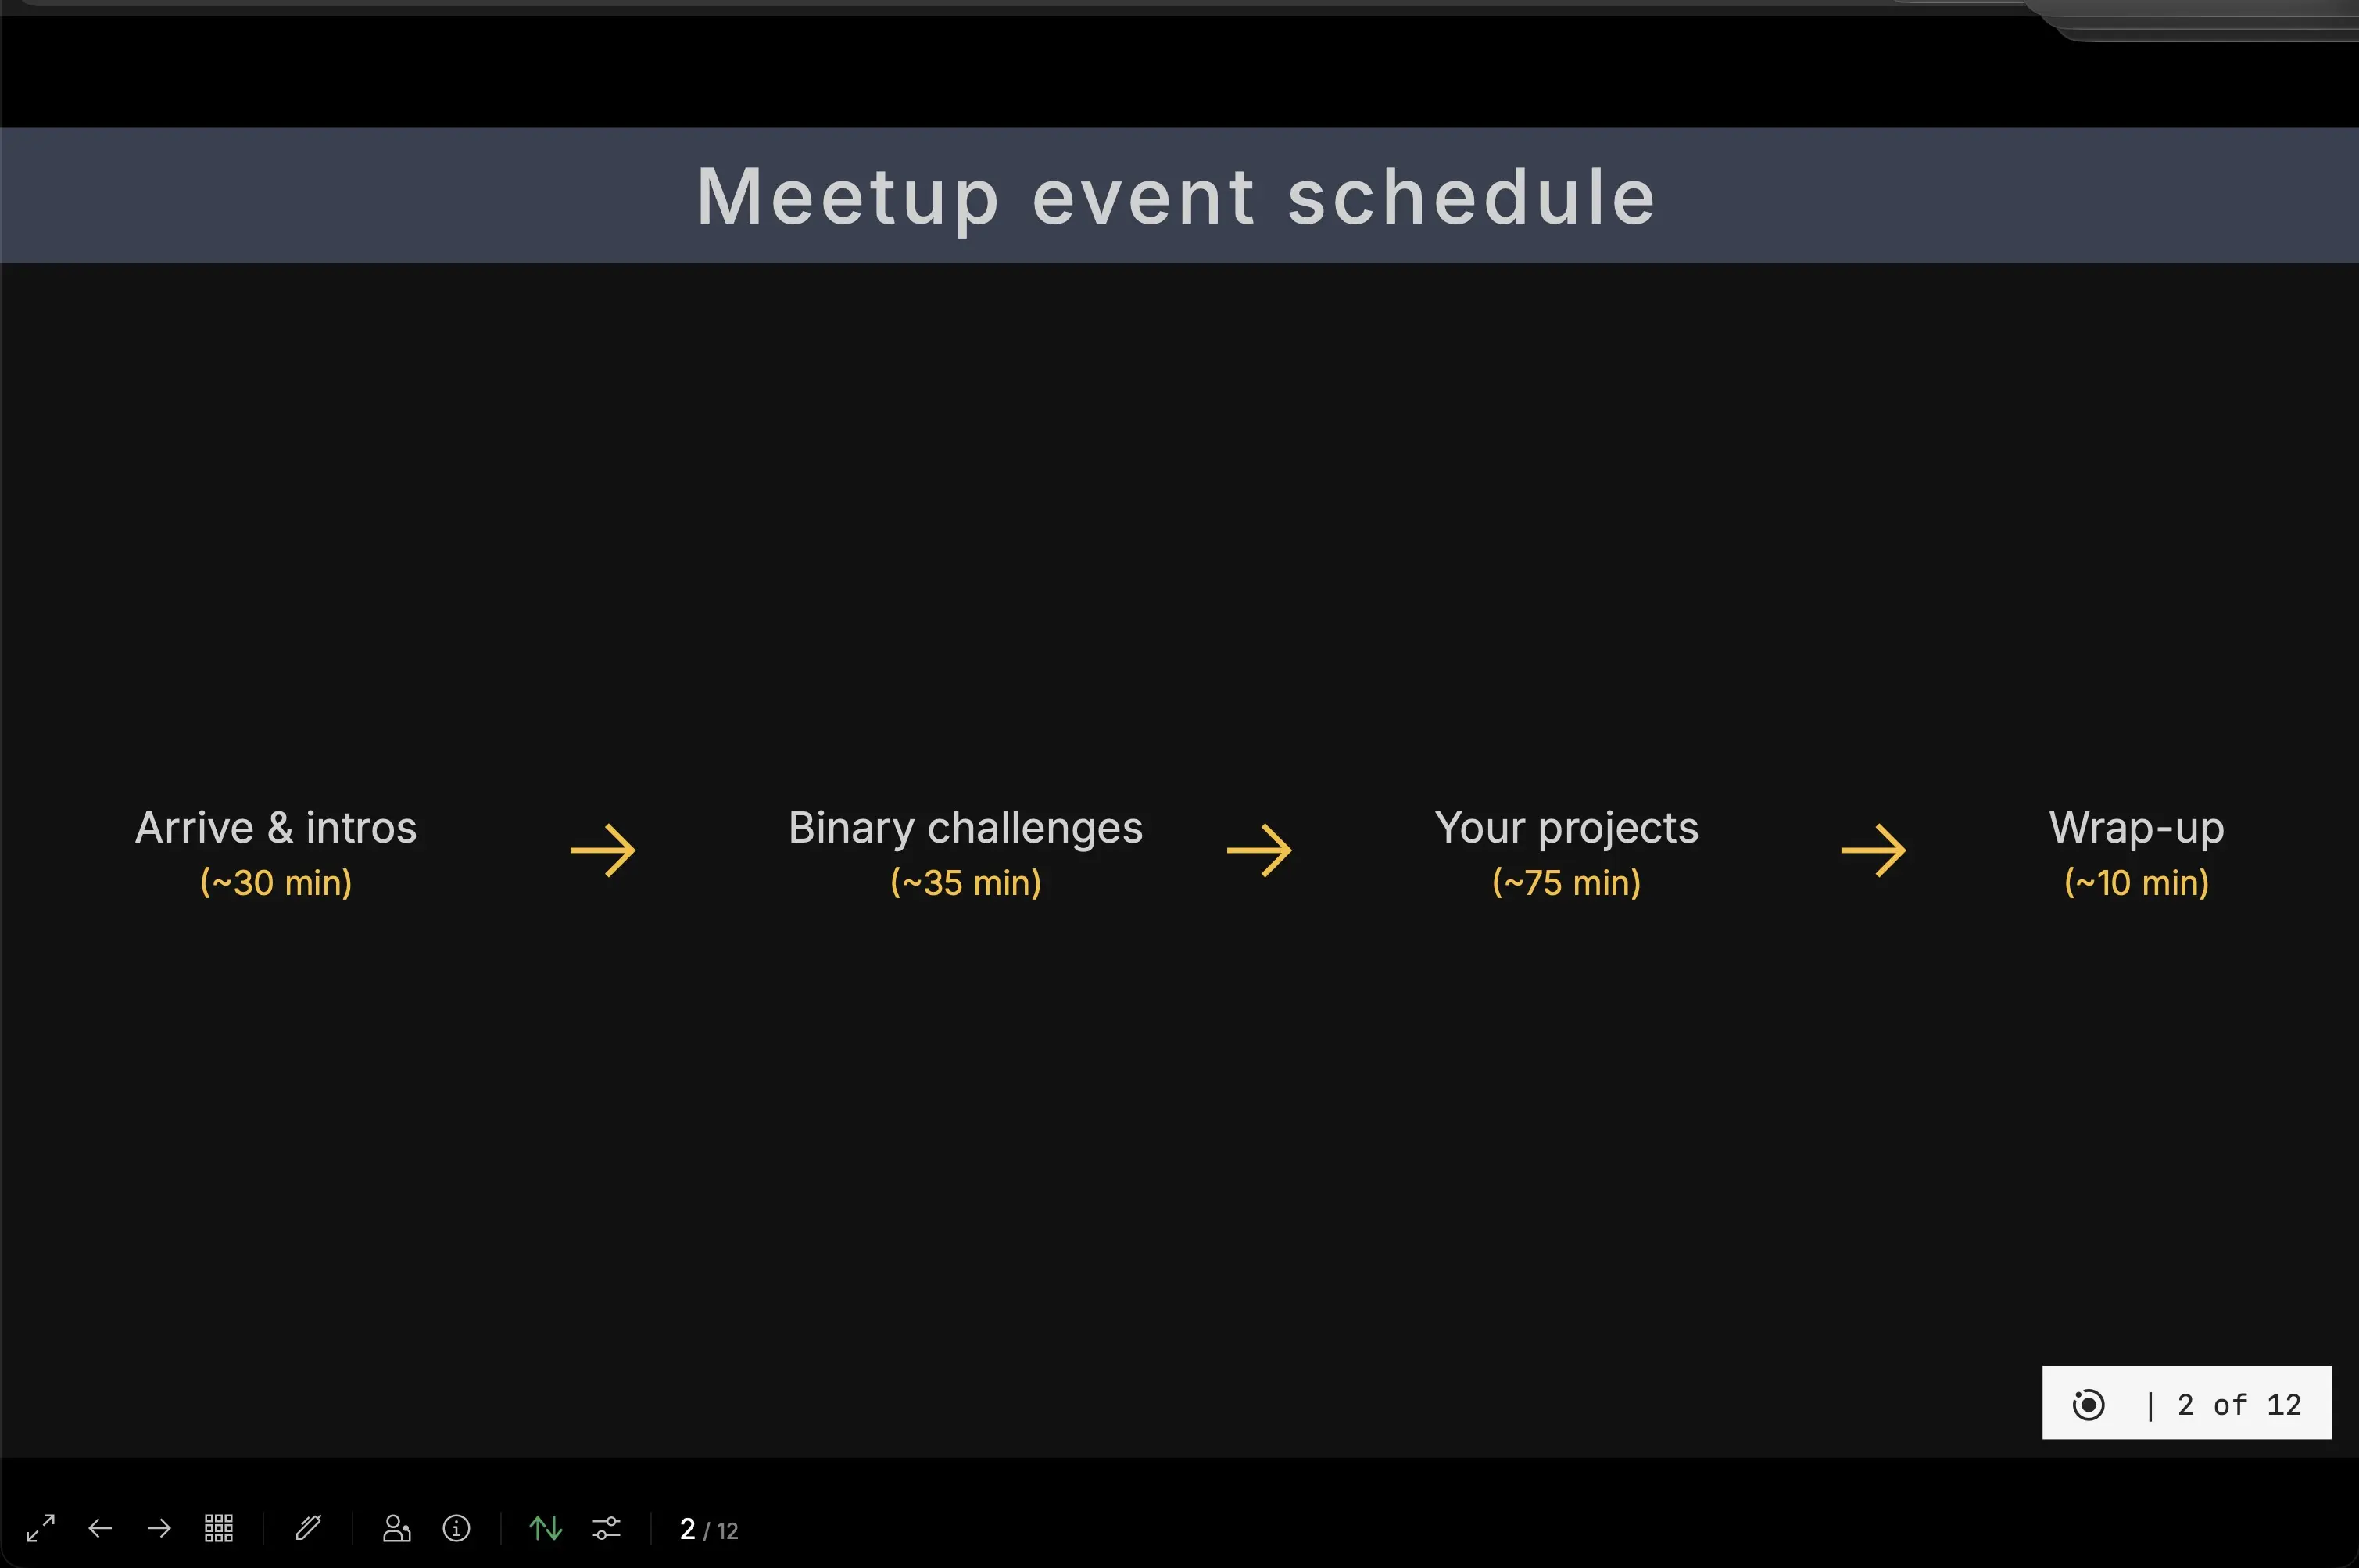
is-6-6 means that the two columns are split equally: 50-50. And is-6 means the same thing. is-6-6 is simply for readability. To learn more about layout: top-title-two-cols, please visit layout: top-title-two-cols in the Slidev Neversink theme documentation.
align: c-lm-lm means aligning the title to the center (c), the content of the left column to the left, horizontally, and the middle, vertically. The align and columns (frontmatter) keys are optional. The layout key is required when using a specific layout.
Adding tables to a Slidev slide
Adding tables to Slidev slides is easy. It's just a matter of adding a Markdown table. However, if I want to wrap the table in a div, I have to make sure there is a blank line between the opening HTML tag and the beginning of the table and a blank line between the closing HTML tag and the end of the table:
<div class="mt-23 [&_table]:w-[53.5rem]">

| Tool | Use it for | Account needed? |
| --- | --- | --- |
| Slidev (this deck) | Point of reference | No |
| Google Colab | For running the binary challenges in Python | A Google account is required |
| CodeFile | For displaying answers | No |

</div>
The Slidev UnoCSS utility class
[&_table]:w-[53.5rem] is a UnoCSS utility class. UnoCSS, Slidev's CSS engine, is compatible with Tailwind CSS syntax, and the utility class turns into real CSS when Slidev builds the deck.
[&_table] is an arbitrary variant. It's a custom selector written inside square brackets. & stands for the element the class is on, and _ stands for a space, which in CSS selectors means "descendant", e.g., div table. So &_table means "any <table> inside this element": in this case, a div element.
w-[53.5rem] is an arbitrary value. It consists of the normal w- width utility, but with a custom value in brackets instead of one of the preset sizes.
Together, on the div that wraps it, [&_table]:w-[53.5rem] generates CSS something like:
div table {
  width: 53.5rem;
}
Slidev renders the Markdown table as its own <table> element inside the <div>, so I can't put a regular CSS class directly on the table. The arbitrary variant reaches into the div and styles the table from outside.
I replaced a <style> block with a UnoCSS utility class. I still could have used a global stylesheet, e.g., style.css at the root of the repo, or styles/index.css. But why didn't I? Because the global styling would have styled all tables in the slide deck instead of a specific table within a specific slide.
The reason why I didn't use a style block to style my Markdown table
But the real question is, why didn't I just use the style element to style the table? Because Vue, which Slidev is built with, turns a <style> block into a separate virtual CSS import. Slidev 53's new import guard, a security check, sees that import as coming from outside the allowed files and blocks it.
So when I initially used the <style> code block in slide 3, it threw an error in the Terminal console:
[vite] Internal server error: [slidev] Import "/slides.md__slidev_3.md?vue&type=style&index=0&scoped=9a47da91&lang.css" from slide Markdown resolves outside of Vite server.fs.allow: /slides.md__slidev_3.md
  Plugin: slidev:slide-import-guard
I resolved the issue by adding a UnoCSS custom utility class and value on the div wrapping around my Markdown table.
Creating the binary challenge slides
The binary challenges I created in the slide deck came from binary exercises Claude created for me so that I could better understand the underlying Python code for my image steganography project. My project's repository on GitHub is set to private, but you can find context in the post entitled How to Hide Data in Images in Python on the Python Code website. It contains the starter code my image steganography project started with. To access this post, please go to slide 11 on the Debug Table binary exercises slide deck.
Creating the Related resource slide
Creating the layout for the Related resource slide was not difficult to achieve. It was creating the QR code that was new for me.
First, I installed the Homebrew package called qrencode:
brew install qrencode
Then, from the deck repo root I ran:
qrencode -t SVG -m 2 -o public/qr-tutorial.svg "https://thepythoncode.com/article/hide-secret-data-in-images-using-steganography-python"
-
-t SVG creates an SVG, which renders a sharp image quality at any size in the browser window (use -t PNG -s 10 for a PNG instead).
-
-m 2 sets a small quiet zone1 around the code.
-
-o public/ puts the QR code SVG in public/, where Slidev serves it as is.
The default color scheme is black on white. This contrast produces the most reliable scans, especially on a dark slide.
On the slide, I referenced it with a forward slash:
<img src="/qr-tutorial.svg" class="w-40" />
However, since I was going to host the slide deck on GitHub Pages, later I ran npm run build -- --base /debug-table-binary-exercises/. --base is an option I passed to the build that rewrote the QR code path automatically. The built src became /debug-table-binary-exercises/qr-tutorial.svg.
To view the complete code for the Related resource slide, please visit The Debug Table Binary Exercises repository on GitHub.
Creating the Find me slide
To create the QR codes for the Find me slide, I used:
qrencode -t SVG -m 2 -o public/qr-mdc-site.svg "https://mariadcampbell.com"
qrencode -t SVG -m 2 -o public/qr-linkedin.svg "https://www.linkedin.com/in/mariacampbell/"
These QR codes point to my personal website and my LinkedIn profile.
Creating the Pyodide code runner
Running Python on the slides: introducing Slidev's code runner feature
I mentioned earlier on that part of the reason I chose Slidev to build the slide deck for my meetup event was its code runner feature. Slidev, and Slidev's code runner feature, don't include running Python code directly in a slide. Out of the box, Slidev, with the help of its Monaco editor, runs JavaScript and TypeScript code in slides.
To run Python code in slides is more complex. To get Python to run in my Slidev presentation, I added it with a custom runner in setup/code-runners.ts:
// setup/code-runners.ts
import { defineCodeRunnersSetup } from '@slidev/types'

const PYODIDE_URL = 'https://cdn.jsdelivr.net/pyodide/v0.28.0/full/pyodide.mjs'

let pyodidePromise: Promise<any> | undefined

function getPyodide() {
    pyodidePromise ??= import(/* @vite-ignore */ PYODIDE_URL)
        .then(module => module.loadPyodide())
    return pyodidePromise
}

export default defineCodeRunnersSetup(() => {
    return {
        async python(code) {
            const pyodide = await getPyodide()
            const lines: string[] = []
            pyodide.setStdout({ batched: (line: string) => lines.push(line) })

            const output = () => lines.map(line => ({ text: line }))

            try {
                await pyodide.runPythonAsync(code)
            } catch (err: any) {
                const errorLines = String(err.message ?? err).split('\n')
                const start = errorLines.findIndex(line => line.includes('File "<exec>"'))
                const useful = start === -1 ? errorLines : errorLines.slice(start)
                return [
                    ...output(),
                    ...useful.filter(line => line.trim()).map(line => ({ error: line.replace(/ /g, '\u00a0') })),
                ]
            }

            return output()
        },
    }
})
There are two parts to the code.
The first part is Slidev's code runner hook: defineCodeRunnersSetup is a helper function that enforces a contract. A contract is a programming term for an agreement (aka interface) between two pieces of code about how to work together. It consists of what one side provides and what the other side promises to do with it. Neither side needs to know how the other side works. They only need to stick to the agreement.
For the code runner, the agreement (aka interface) is:
My code promises an object whose keys are language names, and whose values are functions that take the code as a string and return output objects ({ text }, { error }, or { html }).
Slidev promises to call my function when ▶ is pressed, pass it the editor's code, and display whatever I return.
The second part is an interpreter in the browser (my code loads it). JavaScript runs in the browser out of the box because browsers run JavaScript natively. Python is not native to the browser, so the code runner has to include it.
That's where Pyodide comes in:
Pyodide is a port of CPython2 to WebAssembly/Emscripten. — What is Pyodide?
Emscripten is a complete compiler toolchain to WebAssembly, using LLVM, with a special focus on speed, size, and the Web platform. — emscripten.org
Pyodide makes Python runnable in the browser, and micropip installs Python packages into it. According to the Pyodide documentation:
Any pure Python package with a wheel available on PyPi is supported. — What is Pyodide?
Four main points to know regarding the Slidev Python code runner
- Slidev's hook consists of a language key plus a function that receives the code and returns output.
- Python needs help because browsers only run JavaScript, so Pyodide delivers real Python as WebAssembly.
- Load Pyodide once, and reuse: the first run downloads Pyodide, which is why I warm it up on slide 5.
- Capture and clean up output by redirecting print(), and then trim errors down to the useful part so the error shown on the slide points at the learner's code.
Creating GitHub Pages Actions
First, I had to go to my remote repo inside Settings → Pages → Build and Deployment → Source and choose GitHub Actions. This tells GitHub to publish whatever my workflow builds instead of publishing a branch like gh-pages, for instance.
Next, the Slidev documentation had an example .github/workflows/deploy.yml that I could work with if I wanted. To view it, please visit the Building and Hosting documentation on Slidev. But I created my own file locally at the root of the local repo:
mkdir -p .github/workflows
Then I had to create a deploy.yml file inside workflows:
touch .github/workflows/deploy.yml
Then I added the deploy.yml contents. Below is my original version, with older actions:
name: Deploy pages

on:
  workflow_dispatch:
  push:
    branches: [main]

permissions:
  contents: read
  pages: write
  id-token: write

concurrency:
  group: pages
  cancel-in-progress: false

jobs:
  build:
    runs-on: ubuntu-latest

    steps:
      - uses: actions/checkout@v5

      - uses: actions/setup-node@v5
        with:
          node-version: 'lts/*'

      - name: Install dependencies
        run: npm ci

      - name: Build
        run: npm run build -- --base /debug-table-binary-exercises/

      - name: Setup Pages
        uses: actions/configure-pages@v5

      - uses: actions/upload-pages-artifact@v4
        with:
          path: dist

  deploy:
    needs: build
    runs-on: ubuntu-latest
    environment:
      name: github-pages
      url: ${{ steps.deployment.outputs.page_url }}

    steps:
      - name: Deploy to GitHub Pages
        id: deployment
        uses: actions/deploy-pages@v4
I share the updated deploy.yml version a bit later in the post.
Going back to npm run build -- --base /debug-table-binary-exercises/, this command makes sure that my deck won't reside at the root of a domain. It will be at https://interglobalmedia.github.io/debug-table-binary-exercises/.
Without --base, Slidev builds the site as if it lives at the root, so the page asks for files like /assets/index.js, which the browser looks for at https://<username>.github.io/assets/index.js. Nothing is there, so the deck loads blank. --base tells Slidev to put /debug-table-binary-exercises/ in front of every path, so the files are found.
However, I later noticed that prior deploy.yml actions in other repos contained more recent versions. Specifically:
- checkout
- setup-node
- configure-pages
- upload-pages-artifact
- deploy-pages
Updating GitHub Pages Actions
To update the GitHub Pages Actions, I first needed to install the gh Homebrew package. To install it, I ran:
# It is best practice that you run the brew update command before installing a Homebrew package. This command updates Homebrew itself.
brew update
# if Homebrew returns that some packages are outdated after it updates itself, run brew upgrade to upgrade those outdated packages. This is also best practice.
brew upgrade
# Then you are ready to install the Homebrew gh package
brew install gh
Once I installed the gh package, I was ready to update my outdated GitHub actions.
But what does this gh package do? It installs the GitHub CLI, a command-line tool that lets me interact with GitHub directly from my terminal to create pull requests, manage issues, work with gists, and more. For a comprehensive list of gh commands, please visit the gh manual on cli.github.com.
In order to be able to interact with GitHub using gh, I had to run the following in Terminal (and I ran it at the root of the project repo which contained the outdated actions just for convenience's sake):
gh auth login
The command returned:
gh auth login
? Where do you use GitHub? GitHub.com
? What is your preferred protocol for Git operations on this host? SSH
? Upload your SSH public key to your GitHub account? Skip
? How would you like to authenticate GitHub CLI? Login with a web browser

! One-time code (5C5A-B3C4) copied to clipboard
Press Enter to open https://github.com/login/device in your browser...
✓ Authentication complete.
- gh config set -h github.com git_protocol ssh
✓ Configured git protocol
✓ Logged in as interglobalmedia
When I was taken to the browser, I just followed the prompts to complete my authentication with GitHub. My one-time code was no longer applicable after I used it to complete GitHub authentication and gh quit out of the session. I had made a prior attempt at authentication, but quit the session. In that case, the one-time code expired after a short time (something like 15 minutes).
Then I was ready to update my actions.
I ran the following commands to find out what the latest versions of the actions were:
gh release view --repo actions/checkout --json tagName -q .tagName
# which returned:
# v7.0.1
gh release view --repo actions/setup-node --json tagName -q .tagName
# which returned:
# v7.1.0
gh release view --repo actions/configure-pages --json tagName -q .tagName
# which returned:
# v6.0.0
gh release view --repo actions/upload-pages-artifact --json tagName -q .tagName
# which returned:
# v5.0.0
gh release view --repo actions/deploy-pages --json tagName -q .tagName
# which returned:
# v5.0.1
Then I replaced the older versions of the actions with the newer ones. However, in the cases where the latest version contained a minor version or patch version, I just updated to the major version:
name: Deploy pages

on:
  workflow_dispatch:
  push:
    branches: [main]

permissions:
  contents: read
  pages: write
  id-token: write

concurrency:
  group: pages
  cancel-in-progress: false

jobs:
  build:
    runs-on: ubuntu-latest

    steps:
      - uses: actions/checkout@v7

      - uses: actions/setup-node@v7
        with:
          node-version: 'lts/*'

      - name: Install dependencies
        run: npm ci

      - name: Build
        run: npm run build -- --base /debug-table-binary-exercises/

      - name: Setup Pages
        uses: actions/configure-pages@v6

      - uses: actions/upload-pages-artifact@v5
        with:
          path: dist

  deploy:
    needs: build
    runs-on: ubuntu-latest
    environment:
      name: github-pages
      url: ${{ steps.deployment.outputs.page_url }}

    steps:
      - name: Deploy to GitHub Pages
        id: deployment
        uses: actions/deploy-pages@v5
I used the major versions, e.g. @v7 instead of @v7.0.1 so that a major tag would automatically track the newest release within the major version.
Breaking down the deploy.yml code
The first section involves when the GitHub Actions workflow runs and what it is allowed to do:
name: Deploy pages

on:
  workflow_dispatch:
  push:
    branches: [main]

permissions:
  contents: read
  pages: write
  id-token: write

concurrency:
  group: pages
  cancel-in-progress: false
- on: The workflow runs on every push to the remote main branch. workflow_dispatch also gives me a "Run workflow" button on the Actions tab, so I can rerun it without having to push to remote again.
- permissions: This allows the workflow to read the repo and write to Pages.
- id-token: The write permission lets the deploy step prove to Pages that it's this repo's workflow.
- concurrency: If I push twice quickly, the second deploy waits for the first to complete instead of both running at once.
The second part consists of the build job. It's where npm ci, the build, and --base come in:
jobs:
  build:
    runs-on: ubuntu-latest

    steps:
      - uses: actions/checkout@v7

      - uses: actions/setup-node@v7
        with:
          node-version: 'lts/*'

      - name: Install dependencies
        run: npm ci

      - name: Build
        run: npm run build -- --base /debug-table-binary-exercises/

      - name: Setup Pages
        uses: actions/configure-pages@v6

      - uses: actions/upload-pages-artifact@v5
        with:
          path: dist
- checkout: copies my repo onto GitHub's machine.
- setup-node: installs Node. lts/* means the current long-term-support version.
- npm ci: provides a clean install from package-lock.json, exactly the package versions I have locally. It is stricter than npm install, which suits builds.
- build: runs my build script (slidev build). The -- passes --base ... through to Slidev instead of npm. --base matters because the site lives at username.github.io/debug-table-binary-exercises/, not at the root.
- configure-pages: prepares the Pages setup for the run. It reads the repo’s Pages settings and makes details like the site’s URL available to later steps.
- upload-pages-artifact: packages and uploads static files via the dist/ folder that can be deployed to GitHub Pages.
The third section consists of the deploy job:
deploy:
  needs: build
  runs-on: ubuntu-latest
  environment:
    name: github-pages
    url: ${{ steps.deployment.outputs.page_url }}

  steps:
    - name: Deploy to GitHub Pages
      id: deployment
      uses: actions/deploy-pages@v5
An environment in GitHub Actions is a named deployment target. github-pages is the one GitHub creates for Pages when I set Settings → Pages → Source to GitHub Actions:
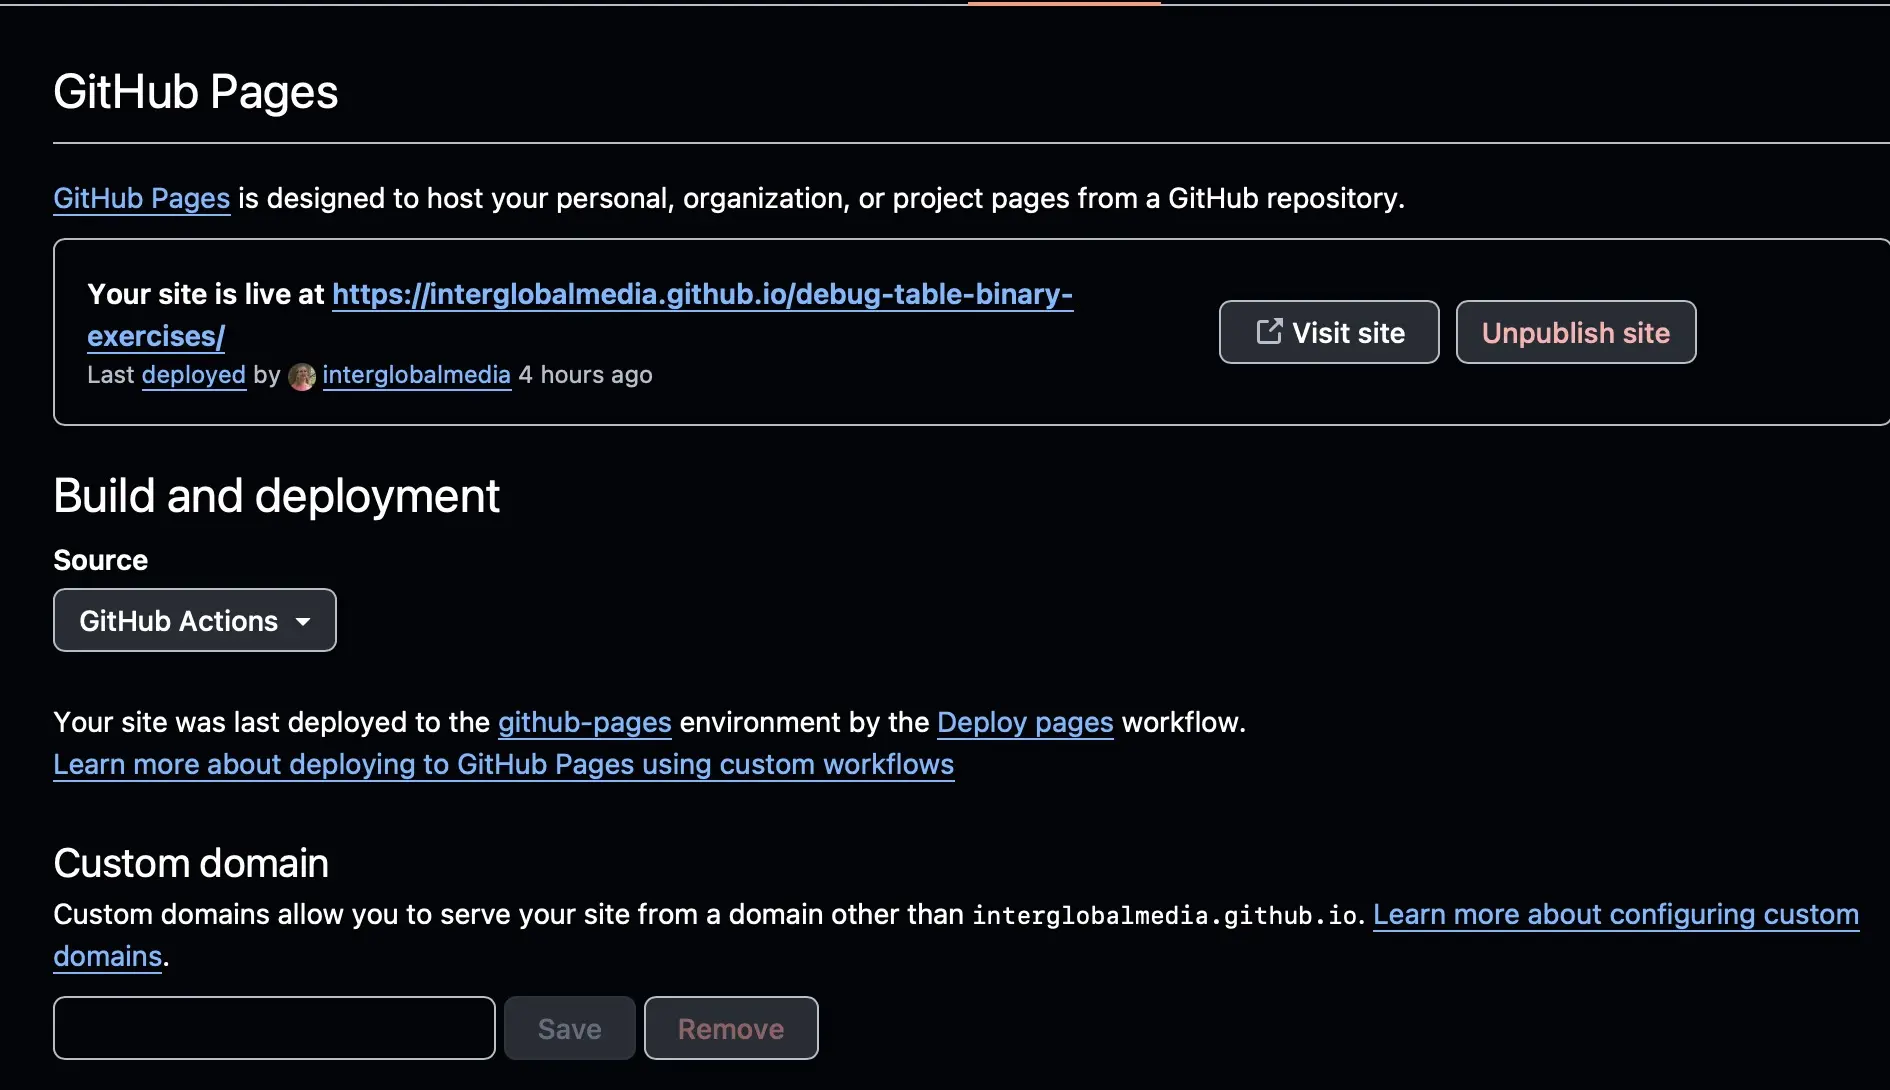
Screenshot of setting debug-table-binary-exercises Source to GitHub Actions
Naming the environment accomplishes the following:
- It records the deployment. Each run appears under "Deployments" on my repo page, with a history of when the site was deployed.
- It applies the environment's rules. Environments can have protection rules (which branches are allowed to deploy, for example).
- url is the link GitHub shows for that deployment. It appears in the deploy job's box, on the run summary page, and in the Deployments list:
- ${{ ... }} is GitHub's expression syntax. It means "work out what is between the curly braces when the workflow runs."
- steps means the steps of the particular job.
- deployment is the step's id. That's what connects the environment URL with the deploy step.
- The deploy-pages action deploys the site and then outputs my live site's address represented by outputs.page_url: https://interglobalmedia.github.io/debug-table-binary-exercises/ in the case of the debug-table-binary-exercises slide deck. GitHub fills in the environment URL once the job has completed.
In the steps section of the deploy job:
- The step's name is the label I see in the run's log as in the screenshot below: Deploy to GitHub Pages.
- The step's id: deployment gives the step a name other parts of the job can refer to.
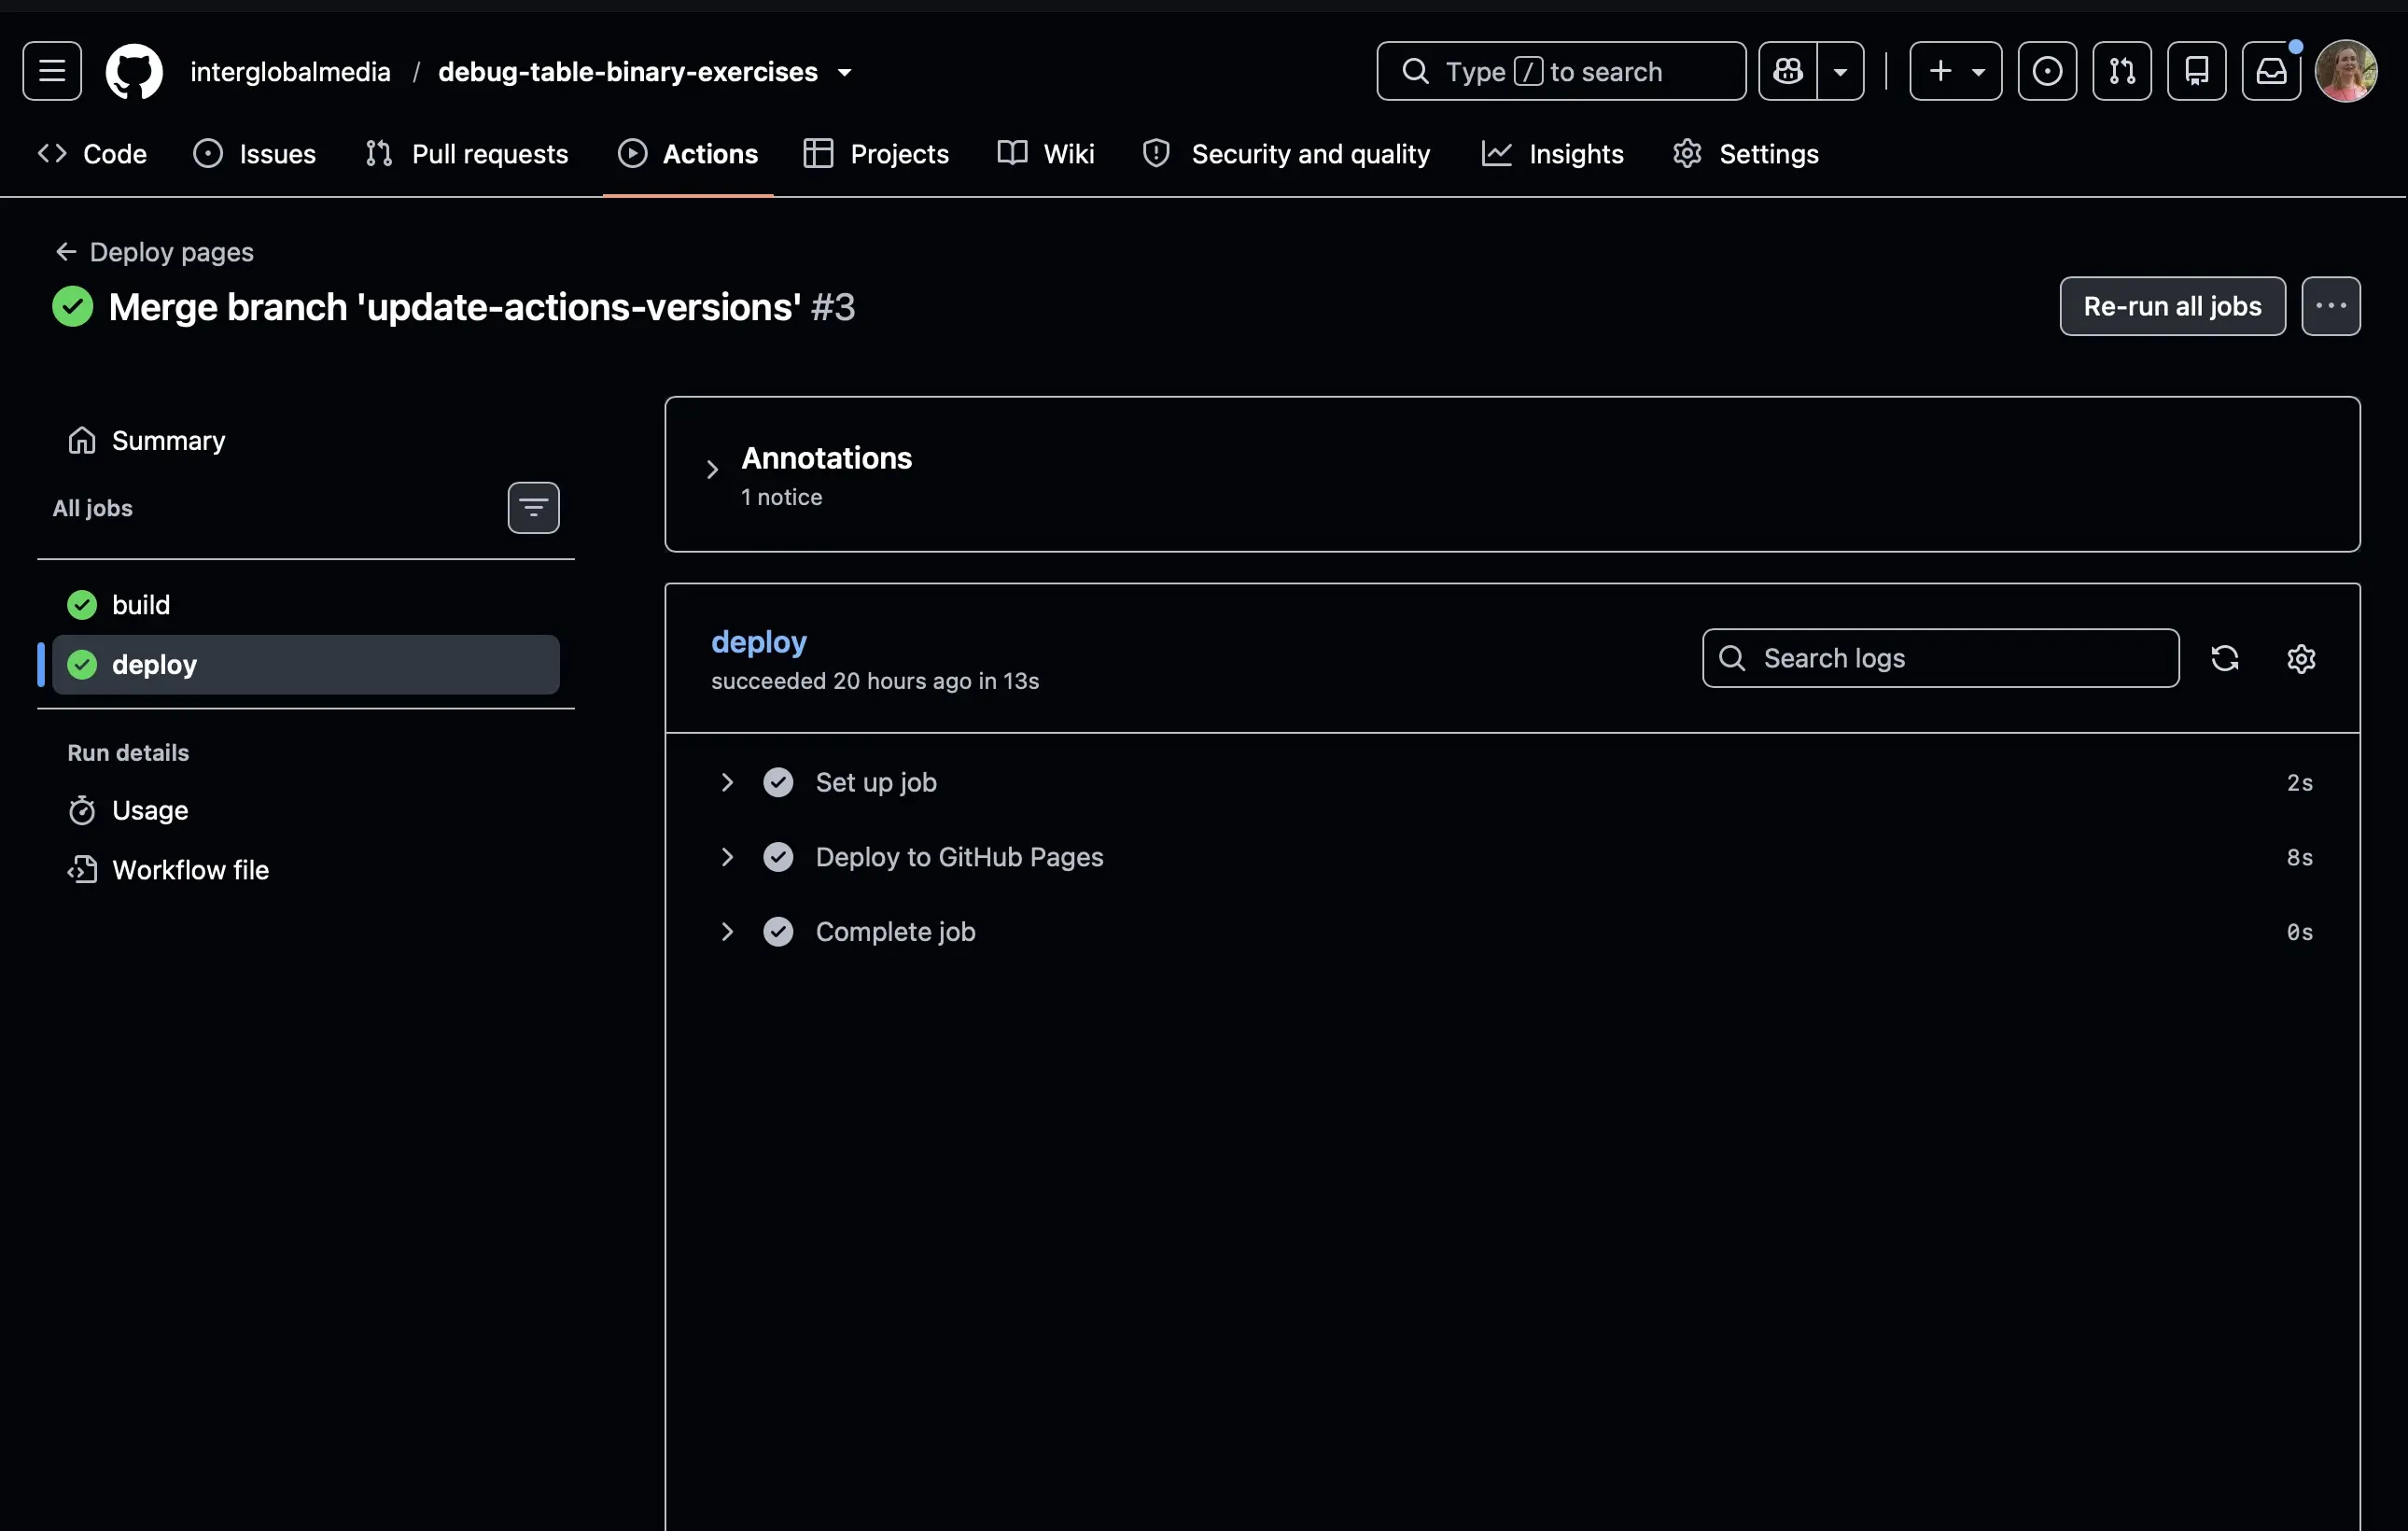
Screenshot of debug-table-binary-exercises Deploy to GitHub Pages
Fixing the CSS minify crash in my first local build
When I ran my first build with npm run build, the following appeared in Terminal:
npm run build -- --base /debug-table-binary-exercises/
...
✗ Build failed in 3.15s
...
Build failed with 1 error:

[plugin vite:css-post]
SyntaxError: [lightningcss minify] Invalid token in pseudo element: Dimension { has_sign: false, value: 1.5, int_value: None, unit: "rem" }
800 |    border-color: currentColor;
801 |  }
802 |  margin-right:1.5rem;width:1rem;--un-text-opacity:1;color:rgb(156 163 175 / var(--un-text-opacity));.dark .slidev-code...
    |                     ^
803 |  }
804 |  .slidev-katex-wrapper .mord.dishonored {
    at Module.<anonymous> (/Users/mariacam/debug-table/debug-table-binary-exercises/node_modules/lightningcss/node/index.js:56:14)
    at minifyCSS (file:///Users/mariacam/debug-table/debug-table-binary-exercises/node_modules/vite/dist/node/chunks/node.js:30541:59)
Why did this happen? Vite 8 switched its CSS minifier from esbuild to lightningcss. The reported issue on the vitejs/vite GitHub repository was related to mine. The lightningcss minifier crashed while minifying the same CSS that Vite 7 had successfully minified. My fix was to turn off CSS minification. I did this by adding cssMinify: false to my vite.config.ts. However, Slidev’s starter did not come with a vite.config.ts file. I had to create one.
So I created what I thought was vite.config.ts, and added the following code to it:
import { defineConfig } from 'vite'

export default defineConfig({
    build: {
        cssMinify: false,
    },
})
Then I ran npm run build -- --base /debug-table-binary-exercises/ again and got the same error.
I couldn't understand why I still had errors. But at one point I went into my slide deck repo, and realized that I had created a vite-config.ts file, not a vite.config.ts file. I changed the name, and ran the build again:
npm run build -- --base /debug-table-binary-exercises/
...
✓ 2192 modules transformed.
computing gzip size...
dist/index.html                                         2.35 kB │ gzip:     0.72 kB
...
dist/assets/slidev/VDrag-BF18WOxn.js                    0.54 kB │ gzip:     0.39 kB
dist/assets/StickyNote-C_zOtTZ5.js                      1.24 kB │ gzip:     0.66 kB
dist/assets/monaco/python-DZNRdlAR.js                   3.45 kB │ gzip:     1.43 kB
dist/assets/top-title-two-cols-CgzP8mN4.js              5.02 kB │ gzip:     1.79 kB
dist/assets/slidev/NoteDisplay-qmAC1BH8.js              6.07 kB │ gzip:     2.65 kB
dist/assets/slidev/CodeRunner-D-taxmIt.js               7.85 kB │ gzip:     3.58 kB
dist/assets/slidev/Monaco-CE2uCY3P.js                   9.65 kB │ gzip:     3.54 kB
dist/assets/slidev/presenter-B_3RsFwa.js               10.46 kB │ gzip:     4.04 kB
...
dist/assets/monaco/bundled-types-C0V6jwW7.js        7,402.37 kB │ gzip: 1,978.36 kB
dist/assets/modules/shiki-CRzu1EmI.js               9,725.29 kB │ gzip: 1,587.59 kB
...
✓ built in 3.63s
What the successful build output shows
| Line in the output | Feature in my deck |
|---|---|
| index.html | The deck's entry page |
| VDrag | The <v-drag> components I used to position elements |
| StickyNote | Neversink's sticky notes on the challenge slides |
| monaco/python | Python syntax highlighting in the editor |
| top-title-two-cols | The Neversink layout on the Pyodide and challenge slides |
| NoteDisplay | My speaker notes |
| CodeRunner | The code runner that shows output under {monaco-run} blocks |
| Monaco | The Monaco editor in the runnable code blocks (monaco: true) |
| presenter | Presenter mode |
| monaco/bundled-types | Type definitions Monaco uses for autocomplete |
| modules/shiki | Syntax highlighting in the regular code blocks |
| ✓ built in 3.63s | The build succeeded |
So fixing the name of the vite config file led to a successful cssMinify workaround.
Adding the cover layout to the title slide
As I got to the end of completing the slide deck, I wasn't very happy with the way my title slide looked. In the beginning, I had a line under the title, and I really liked the look a lot. I don’t even remember why I removed it, but I wanted it back!
So, initially, I deployed the deck setting the first slide's layout to:
layout: intro
The title slide was very plain. It only contained the title and my byline underneath:
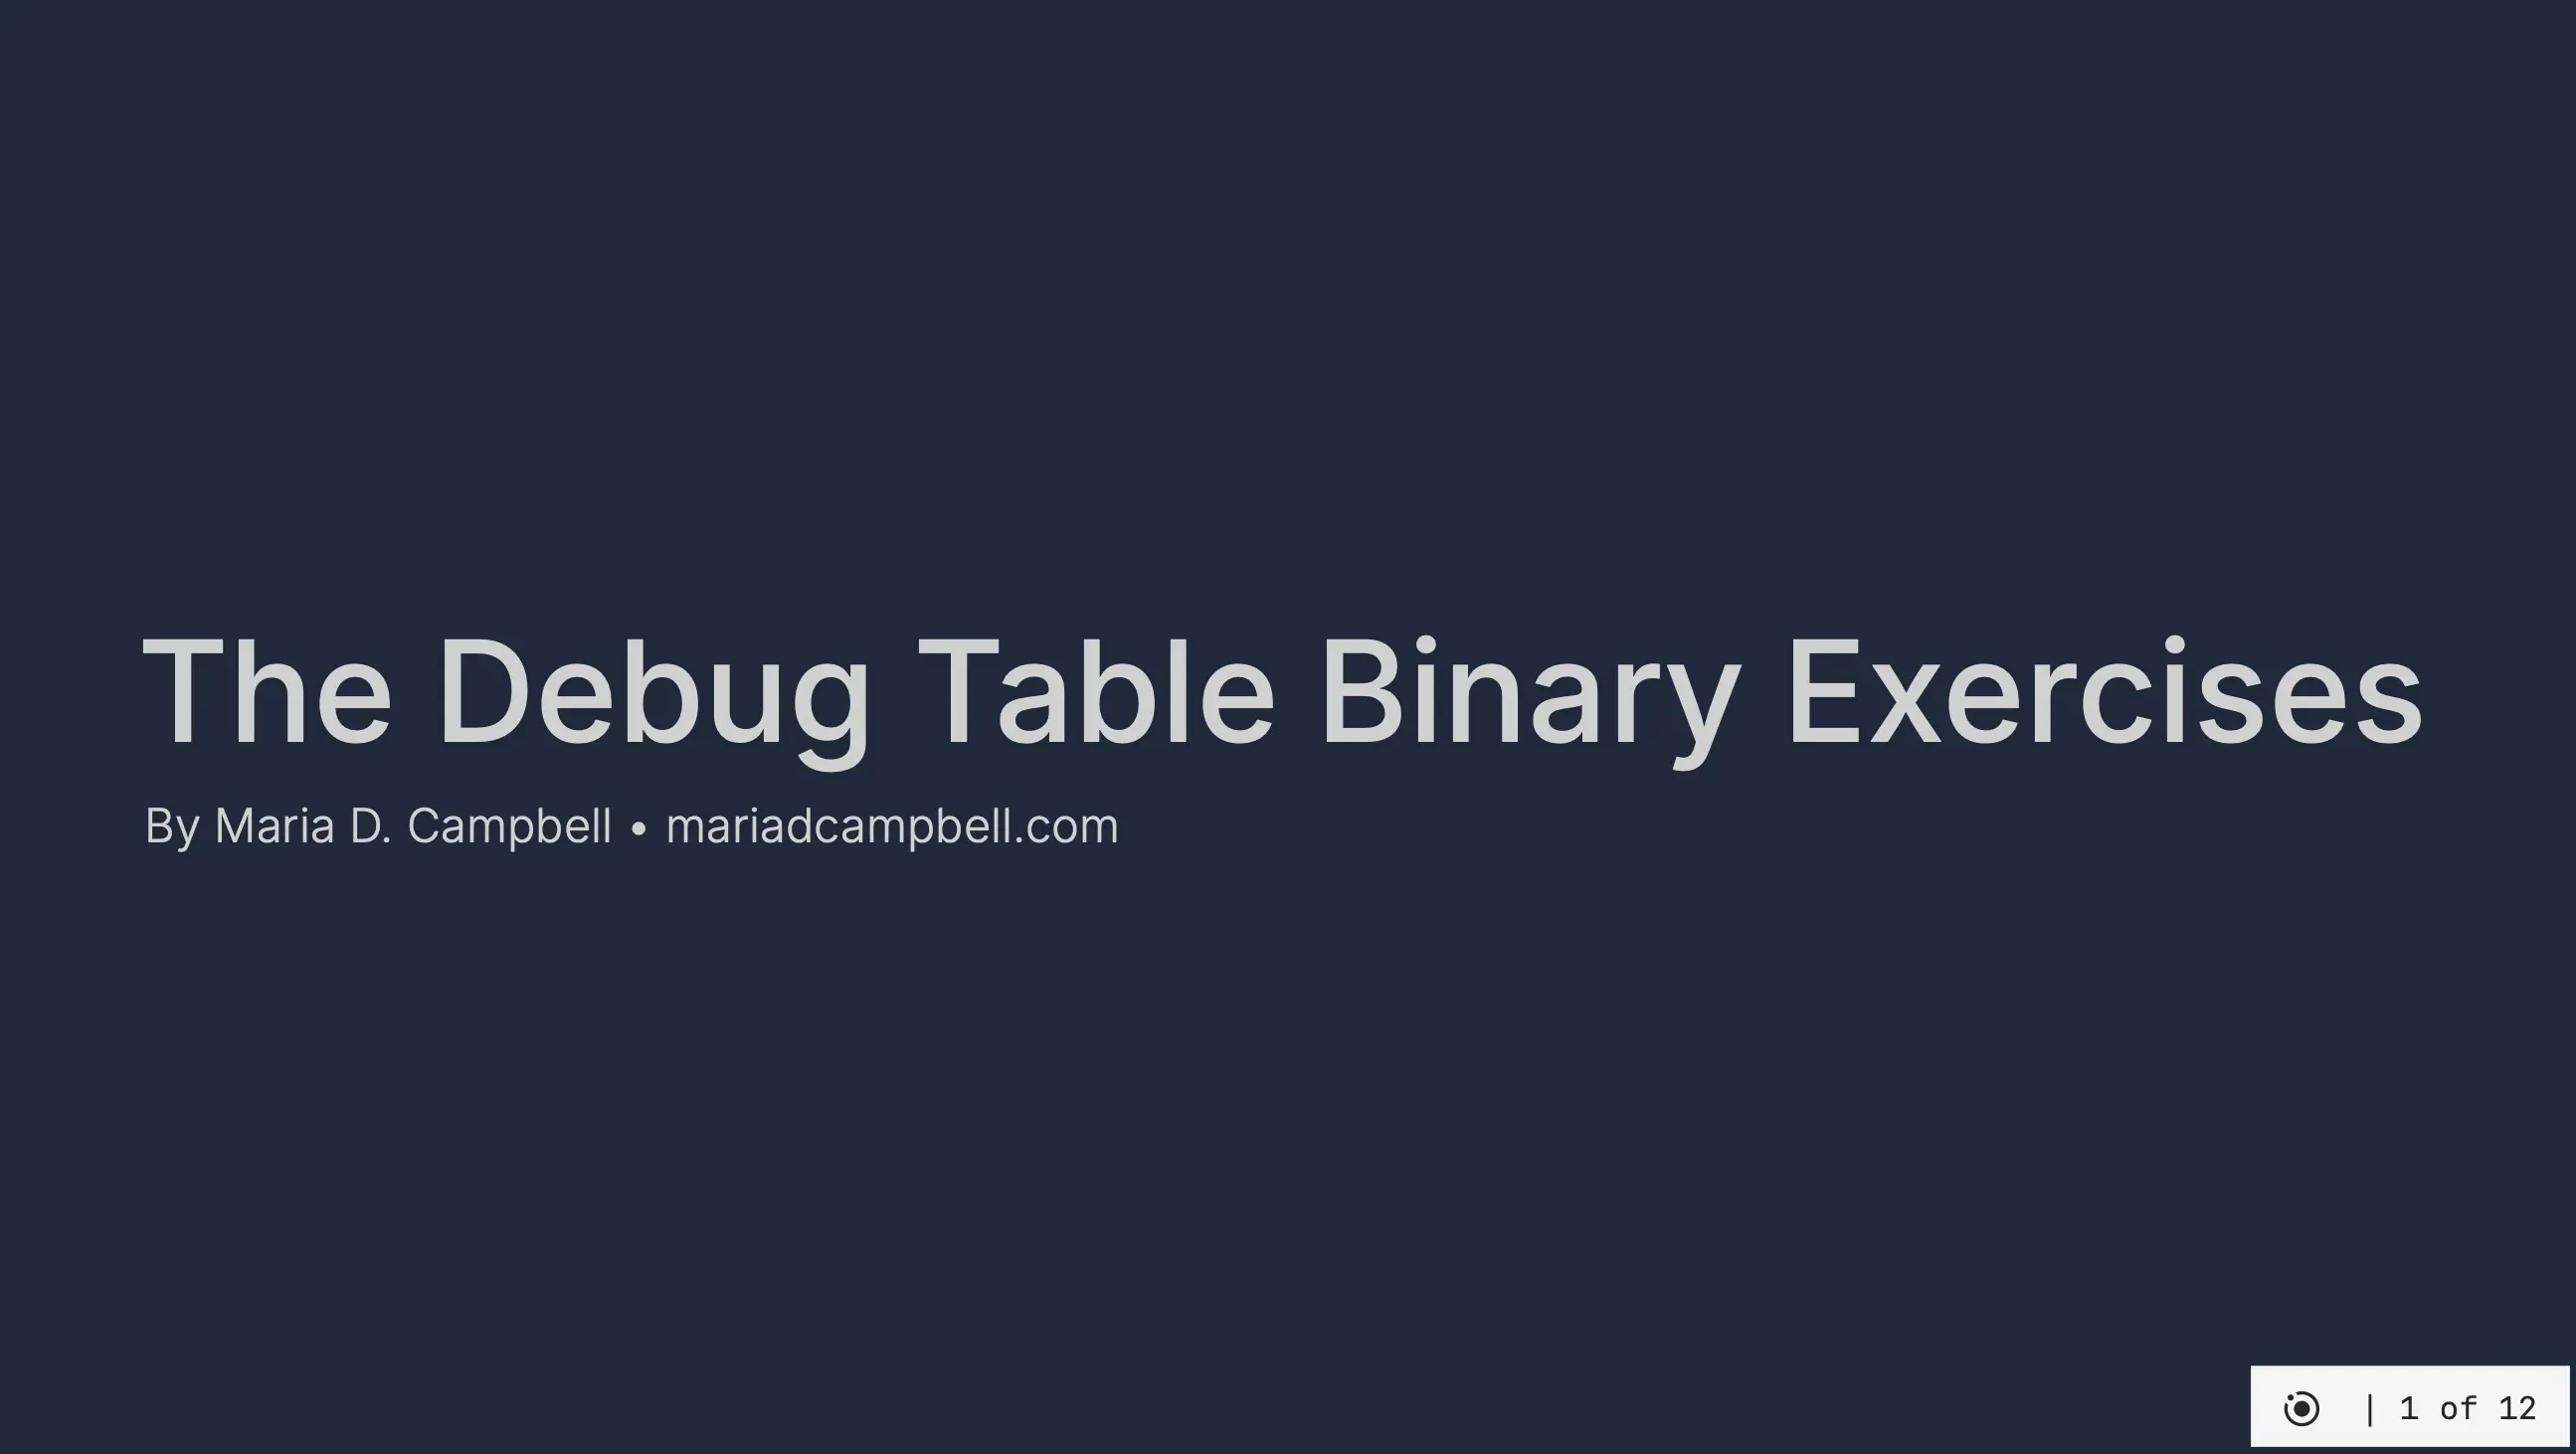
Screenshot of title slide with intro layout
So I changed layout: intro to layout: cover, and this is how it looks now:
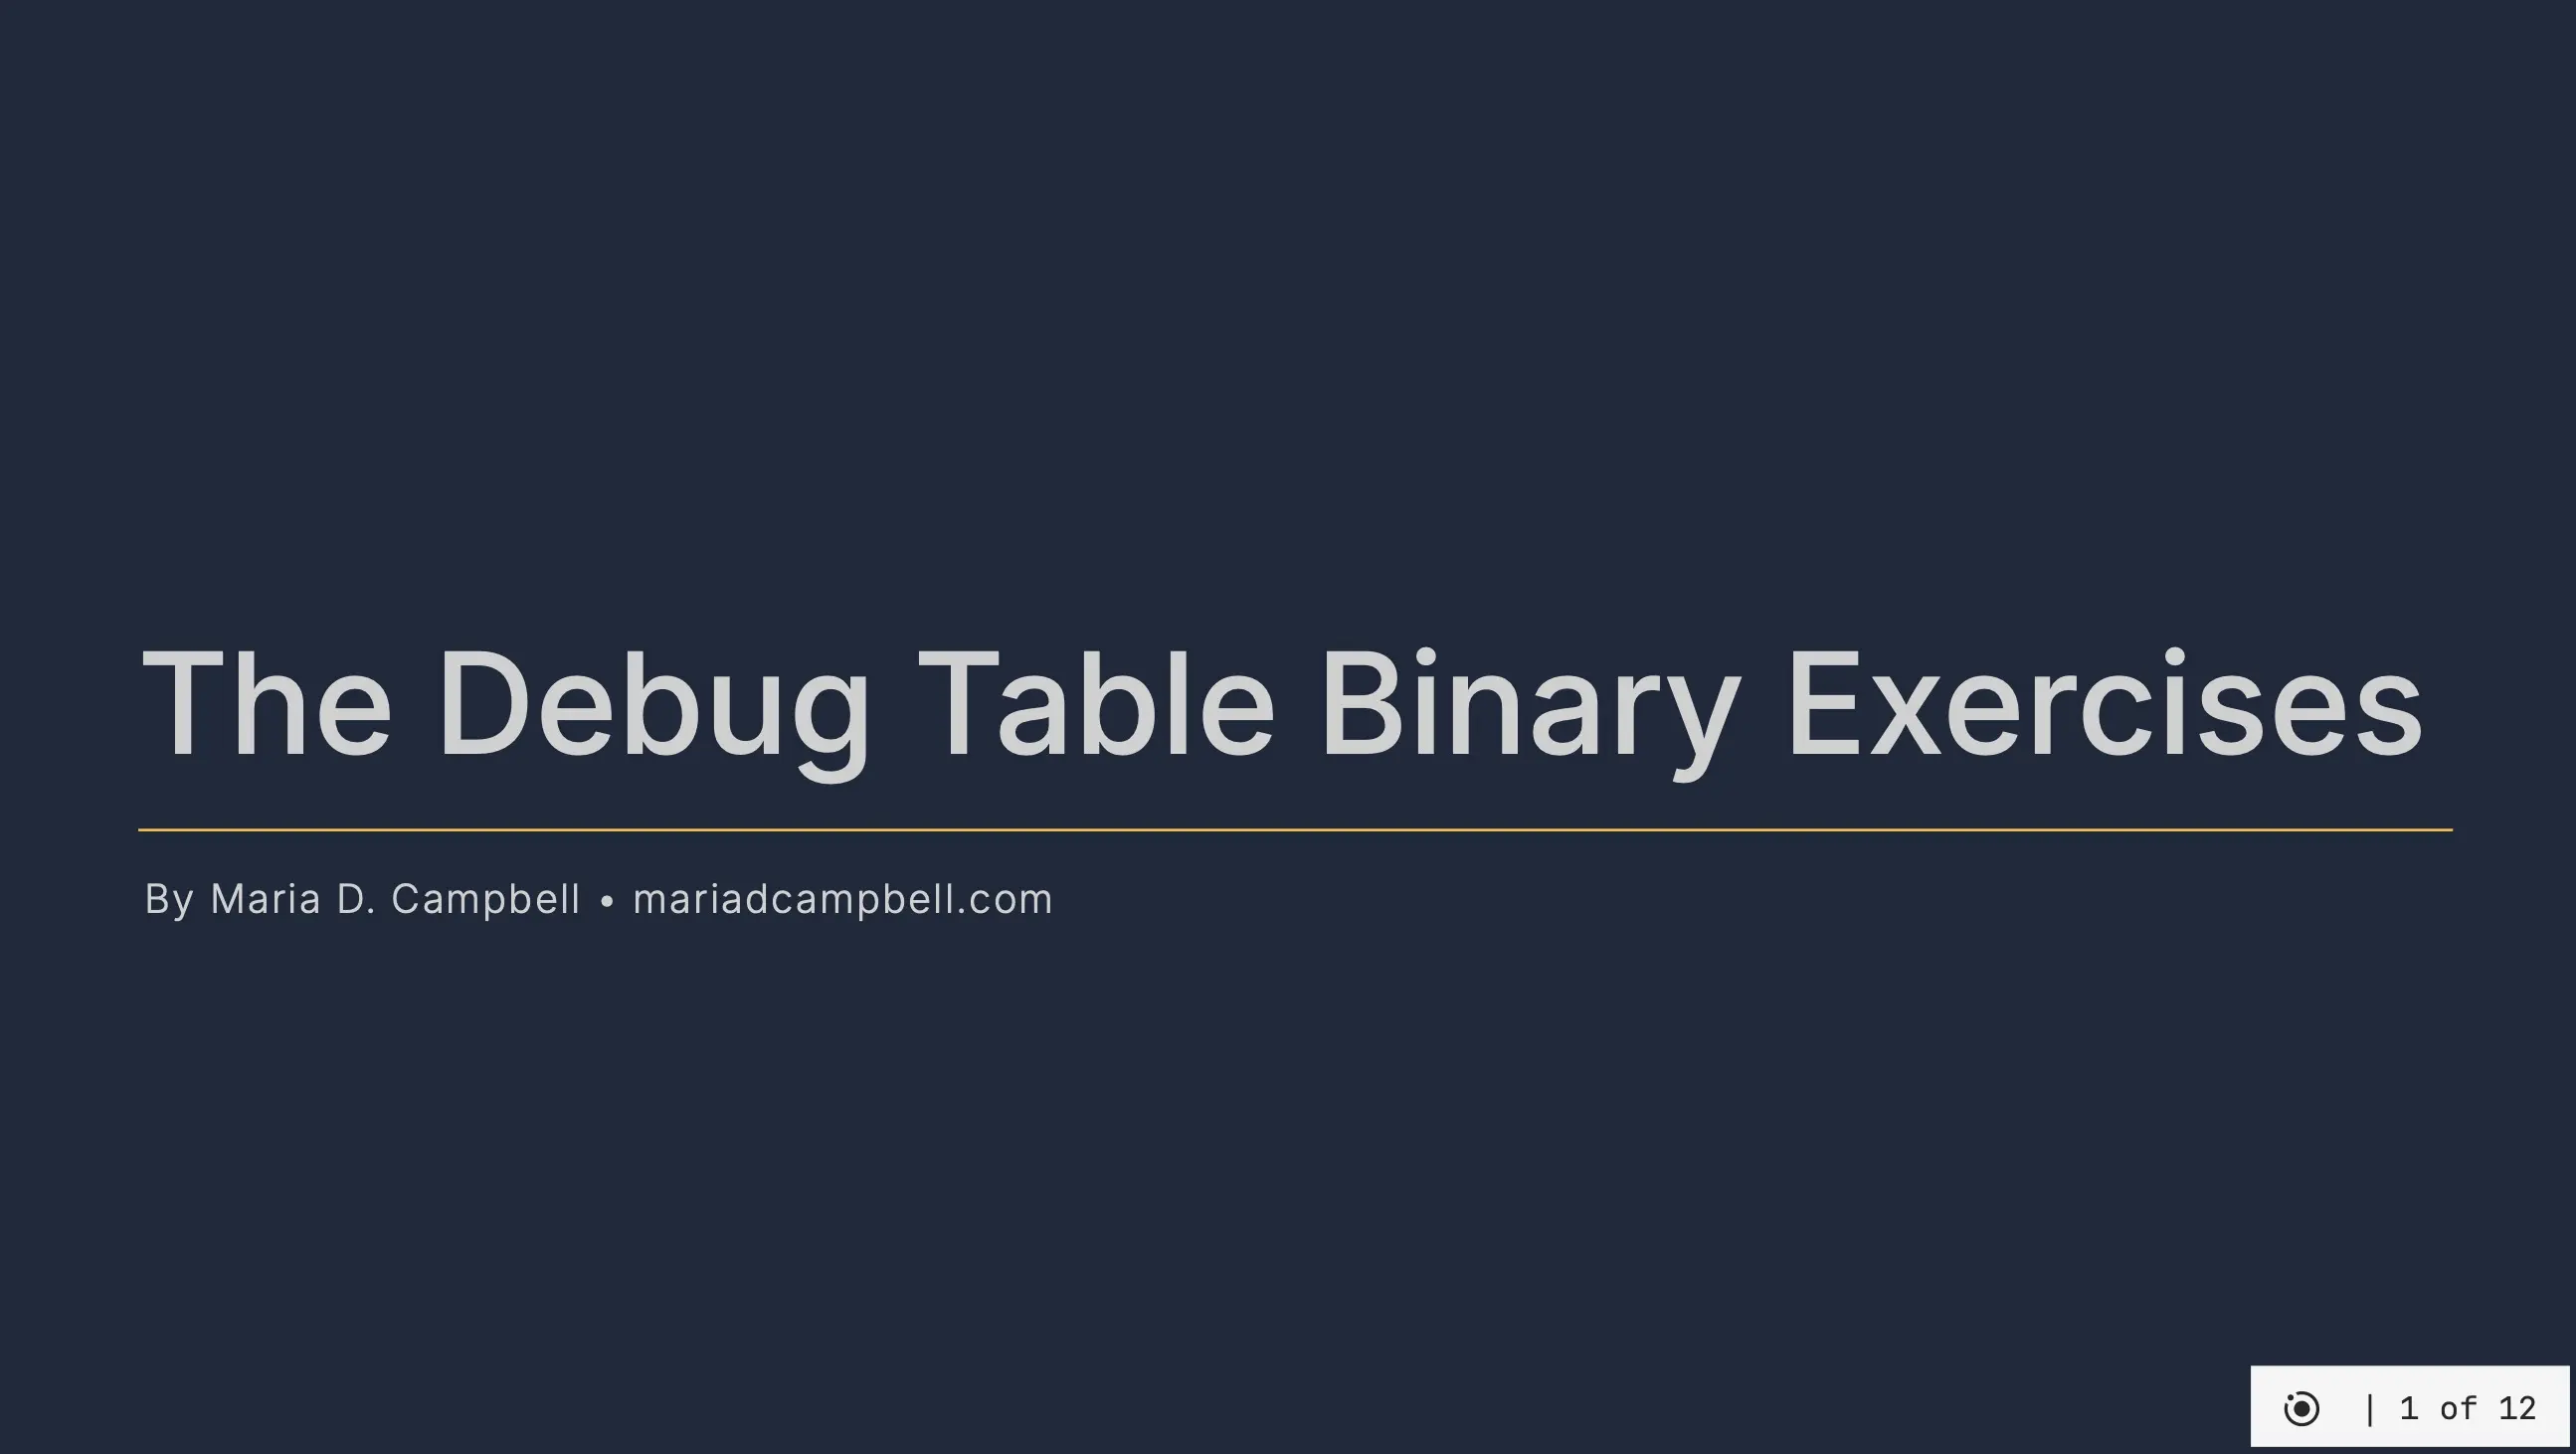
Screenshot of title slide with cover layout
The Slidev MCP server
Last, but not least, I want to talk about Slidev's MCP server: partially because I am going to build my own MCP server, and partially because I wanted to share what it does both for my own edification and for others'.
Code runner vs MCP server
| Category | Code runner | MCP server |
|---|---|---|
| What it is | A function I write in setup/code-runners.ts with defineCodeRunnersSetup. Slidev calls it. | A program built into Slidev that offers tools to an AI client. I don't write it. |
| What triggers it | Someone pressing ▶ on a code block in the deck. | An AI client such as Claude Code or the Claude desktop app calls one of its tools. |
| Is AI involved? | No. | AI is the caller. |
| Where it runs | In the viewer's browser. Pyodide runs Python as WebAssembly. | On my Mac, two ways. HTTP: inside the dev server at http://localhost:3030/__mcp. stdio: as its own process, started by the AI client. |
| What it does | Runs code and returns output lines, which Slidev shows under the block. | Reads, edits, inserts, removes, and moves slides, and navigates to a slide (the eight tools). It doesn't run code. |
| Works on the deployed GitHub Pages deck? | Yes. It's part of the build, and Pyodide loads from the CDN. | No. It exists only while npm run dev (or npx slidev mcp slides.md) is running. The static build has no server. |
| How I turn it on or off | It exists because I wrote it. Remove the python function and Python blocks can't run. | HTTP: on by default, turned off with mcp: false in the headmatter. stdio: runs only when it's started. |
| What defines how it talks | Slidev's own contract. The function receives the code and returns { text } or { error } objects. | The Model Context Protocol, an open standard any MCP client can use. |
How the Slidev MCP server works
When I run npm run dev, Slidev starts two things side by side: the deck in my browser, and an MCP server at http://localhost:3030/__mcp:
npm run dev

> dev
> slidev --open

Loading Neversink 0.4.1 theme vite.config.ts...
(!) Your Vite config uses features that are unsupported by `configLoader: 'native'`, which is planned to become the default in a future major version of Vite:
  - JSON import "./package.json" without import attributes (node_modules/slidev-theme-neversink/vite.config.ts:5:25). Add `with { type: 'json' }`
Set `VITE_CONFIG_NATIVE_IGNORE_WARNING=true` to suppress this warning.
Loading Neversink 0.4.1 theme uno.config.ts...


  ●■▲
  Slidev  v53.0.0

  theme       slidev-theme-neversink
  css engine  unocss
  entry       /Users/mariacam/debug-table/debug-table-binary-exercises/slides.md

  public slide show   > http://localhost:3030/
  presenter mode      > http://localhost:3030/presenter/
  slides overview     > http://localhost:3030/overview/
  export slides       > http://localhost:3030/export/
  mcp server         > http://localhost:3030/__mcp # MCP server link
  remote control      > pass --remote to enable

  shortcuts           > restart | open | edit | quit
I could also run the MCP server without the dev server:
npx slidev mcp slides.md
The server provides an AI client eight tools for working on my slide deck:
- The AI client can read the deck:
- slidev-get-info (an overview)
- slidev-list-slides (number, title, and layout of every slide)
- slidev-get-slide (one slide's frontmatter, content, and notes)
- The AI client can change the deck:
- slidev-update-slide
- slidev-insert-slide
- slidev-remove-slide
- slidev-move-slide
- The AI client can drive the live presentation:
- slidev-goto-slide (only while the dev server is running)
What the MCP server could do for me
I'd connect an AI client (e.g. Claude Code, with claude mcp add --transport http slidev http://localhost:3030/__mcp) and ask in plain language via text prompts:
- "List my slides and their layouts." → slidev-list-slides
- "Add speaker notes to slide 5 reminding me to run it during setup." → slidev-update-slide
- "Insert a slide after slide 9 with the top-title-two-cols layout." → slidev-insert-slide
- "Go to slide 10." → slidev-goto-slide, and the browser jumps there
The AI then changes slides.md via those tools. Each change lands in the browser right away through the dev server's live reload.
I could only describe what the Slidev MCP server does and not prove it through an actual walkthrough. But I plan to write about how I use the Slidev MCP server to interact with my slide deck, accompanied by a screen recording of the process.
Conclusion
In this post, I walk through the process of building a slide deck for my Debug Table meetup's second gathering with the web-based slides maker called Slidev. I discuss the problems I had building the deck because of Vite 8's switch from esbuild to lightningcss for minifying CSS and the workaround I implemented.
I talk about the various features Slidev has to offer and which ones I employ. One important feature I use, which was integral to the meetup event, is adding a Python code runner so attendees could write live Python code directly in a slide and get back their code's output with the press of a play button.
Working through creating the binary challenges freed me from being stuck on a piece of code I have been working on in my image steganography project. The challenges emanate from working on binary exercises to better understand what was going on with the encoding and decoding of messages in my image steganography project. I was especially struggling with how to modify the code in my decode_message() function to reflect the change I was going to make to the message decoding process. Revisiting the challenges and organizing the answers for the meetup resulted in an "aha" moment. Specifically, how decode_message() should return the raw bytes. Originally, decode_message() treated two-byte UTF-8 characters as two separate characters. By modifying the code to join the two bytes, decode_message() will return the two-byte character as one, such as é, correctly, instead of garbage.
Lastly, even though I haven't used the Slidev MCP server feature yet with this deck, I have included it because I will be using the Slidev MCP server to interact with this slide deck. So I wanted to share a taste of what it has to offer. I will also be building my own MCP server, so learning about Slidev's server gave me a better understanding of how MCP servers work under the hood.
Related Resources
- The Debug Table Binary Exercises repo on GitHub: interglobalmedia on GitHub
- Slidev Getting Started: Slidev documentation
- npm install slidev-theme-neversink: Slidev theme repo on GitHub
- slidev/packages/types/src/code-runner.ts: Slidev repo on GitHub
- Configure Code Runners: Slidev documentation
- Pyodide: Pyodide documentation
- Emscripten: Emscripten website
- micropip: micropip.pyodide.org
- What is the Model Context Protocol (MCP)?: modelcontextprotocol.io
- What is a QR Code Quiet Zone and Why Does It Matter?: by Shreesh, The QR Code Generator
- Building and Hosting: Slidev documentation
- Use Latest version of a GitHub Action #88510: GitHub community on GitHub
- Update Homebrew: mac.install.guide
- gh: GitHub gh manual
- Deployment environments: GitHub documentation
- Managing environments for deployment: GitHub documentation
- Vite 8 default cssMinify: 'lightningcss' drops unprefixed backdrop-filter, breaking glass/blur effects (regression vs Vite 7) #22649: vitejs/vite on GitHub
- MCP Server: Slidev documentation
Footnotes
-
According to The QR Code Generator:
↩The quiet zone is the blank, unprinted space surrounding a QR Code. It is a buffer that helps scanners detect where the code starts and stops. Without it, the scanner’s edge detection fails, leading to missed scans.
-
CPython is written in C and Python, and it is the default and most widely used implementation of Python. ↩